This guide is an overview of how to load data into the GenomeSpace user interface, from a variety of tools and resources which connect to GenomeSpace. This guide describes methods for obtaining data, and is not meant to be comprehensive documentation for the given tools. For more information on each tool, see the list of GenomeSpace tools and the help links provided on each tool's page.
If you are having problems launching certain desktop tools, which depend on the Java Network Launch Protocol (JNLP), see FAQ2.2 for solutions. These solutions were updated February of 2015, and should take you about five minutes to incorporate. They involve adjusting your browser pop-up blocker and system's Java security exception site list.
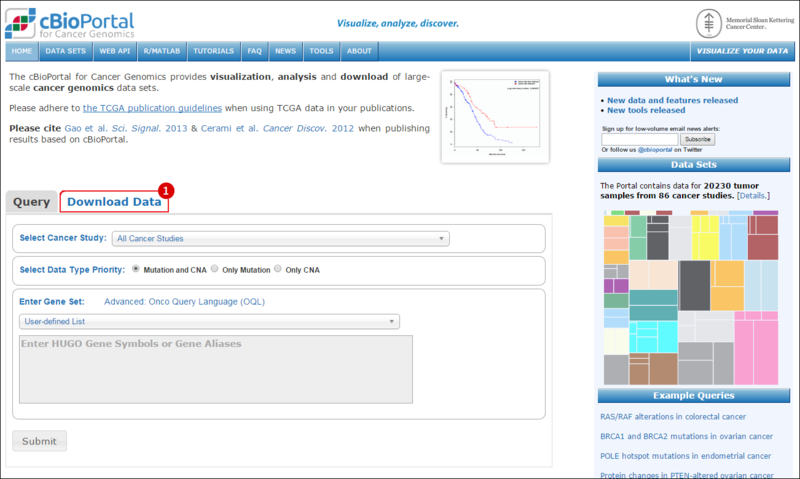
For tool-specific documentation, check out the main Tool Guide:
In GenomeSpace:
Release the mouse button to drop the file(s). If you drop the file(s) onto a subdirectory, the GenomeSpace user interface will open that directory and upload the file(s) to there. If you drop the files anywhere else in the currently displayed directory, either on a file name and or on white space in the display, the files(s) will be uploaded to the current directory.
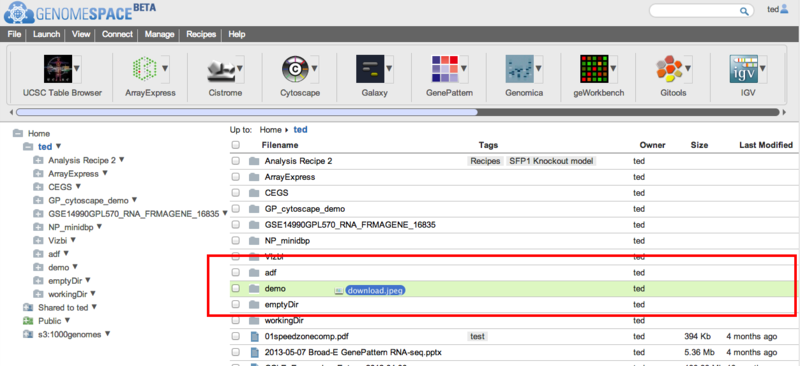
To see recent uploads, you can click on the View > Recent uploads menu item. This will show a dialog that tracks your upload queue. You can dismiss the dialog by clicking Close.

For more information about drag-and-drop uploads to GenomeSpace, see the GenomeSpace blog post.

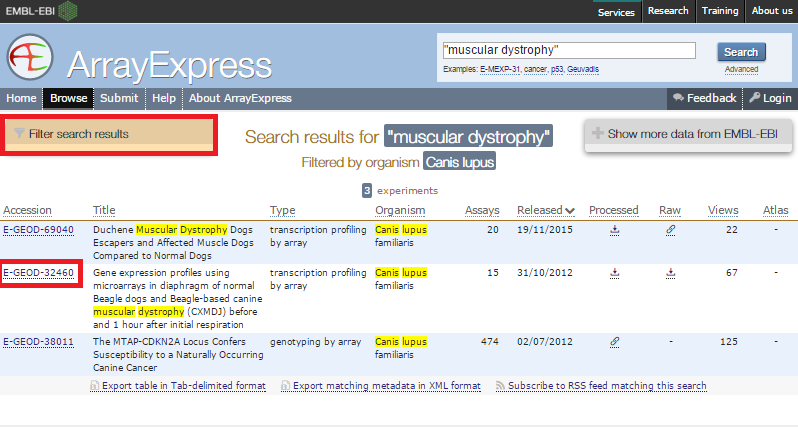
ArrayExpress shows you the upload status of each file.

If this is your first time loading ArrayExpress data into GenomeSpace, ArrayExpress creates an ArrayExpress folder in the top level of your GenomeSpace home directory. Subsequently, ArrayExpress creates a separate subdirectory in that folder for each experiment you upload.
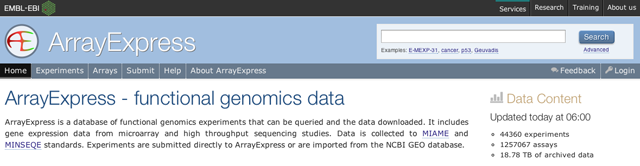
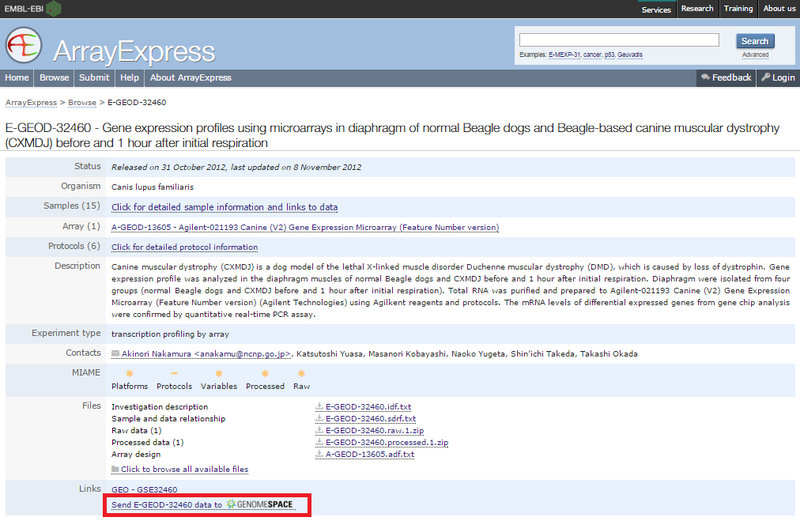
One way you can use the ArrayExpress experiment files (which are in MAGE-TAB format) you download is to send them to GenePattern's MAGETABImportViewer module to create GCT and CLS files for analysis. See the MAGETABImportViewer module documentation for more information on the specific MAGE-TAB format the module can receive.

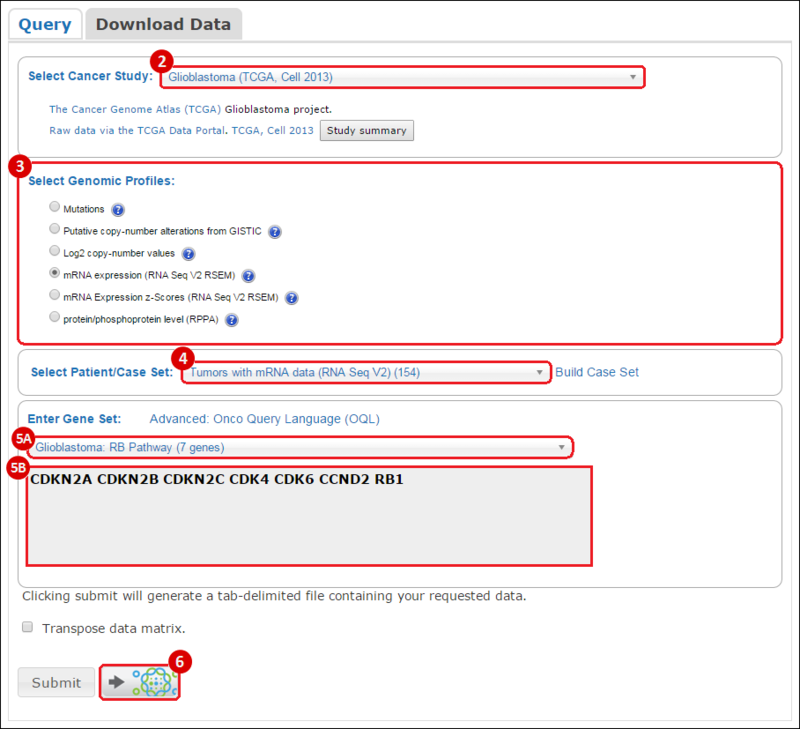
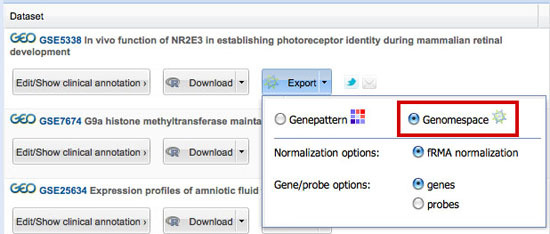
Select Cancer Study: select from the drop-down menu the study of your choice, e.g. glioblastoma tumor samples.Select Genomic Profiles: select the datasets that you are interested in, e.g. gene expression data (mRNA expression).Select Patient/Case Set: select the set of samples you are interested in, e.g. only samples with mRNA expression data.Enter Gene Set: enter a gene set of interest one of the following ways:
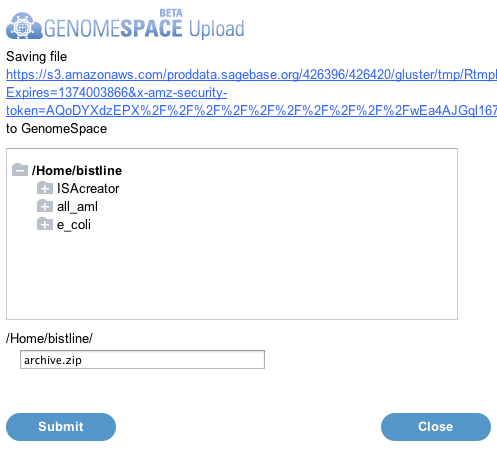
A pop-up window will appear, allowing you to save the compiled dataset to GenomeSpace.
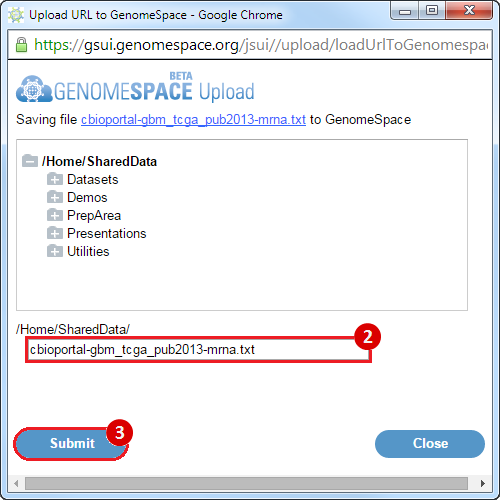
Submit button to upload the data to GenomeSpace.


If you have not logged into InSilico DB before with your GenomeSpace ID, you will need to:
InSilico DB will then send you a confirmation email. Click the link in the email to confirm your registration.


There are two options for this:
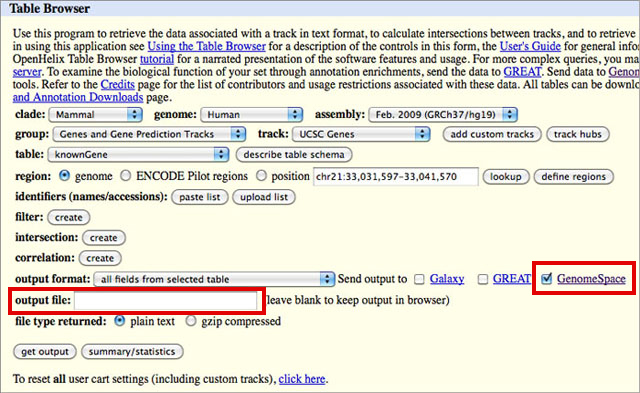
NOTE: You must add the correct extension to your file name. If, for instance, you select BED in the output format drop-down, you will need to add .bed to your output file name. The UCSC Table Browser does not do this for you, and some of the GenomeSpace tools depend on the file extension to determine file type.


Summary
This recipe provides an outline of how to use the Reactome pathway browser to idenity a list of genes or proteins in a pathway, then save the list as a file in your GenomeSpace data store.
Input:
For more information about the Reactome pathway browser, see http://wiki.reactome.org/index.php/Usersguide#The_Pathway_Browser
Recipe Details
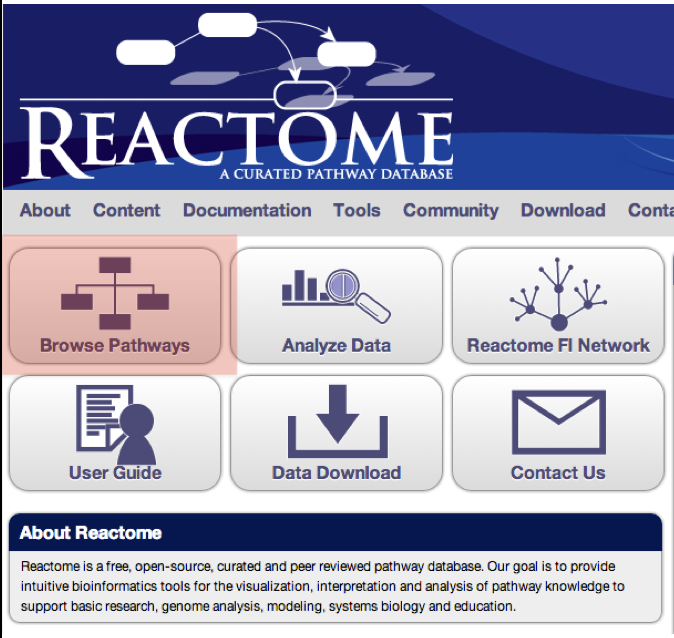
1. Click on the Reactome icon in the GenomeSpace toolbar

You will be sent to the Reactome website.
2. Click on Browse Pathways
This will take you to the Reactome pathway browser.
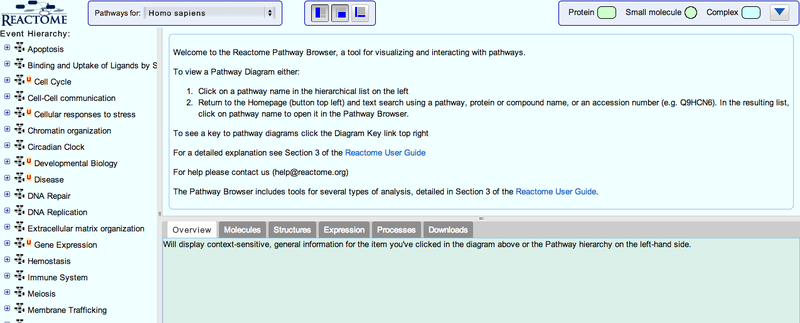
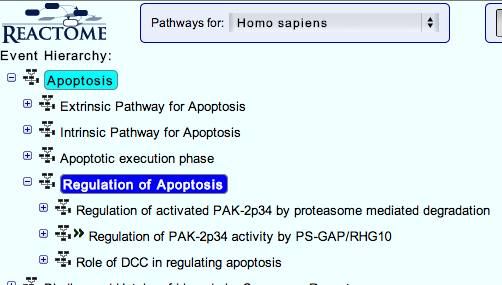
3. You can navigate the pathway hierarchy by clicking on the  symbol on the left side of the pathway labels. Open Apoptosis->Regulation of Apoptosis
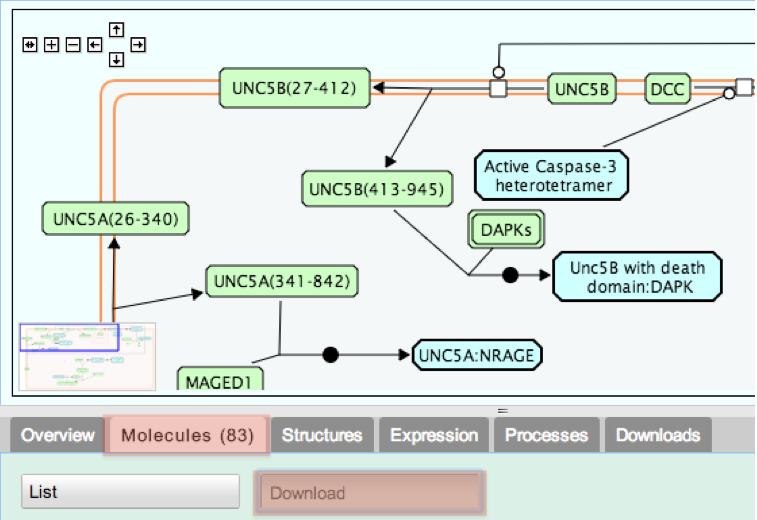
4. From the tabs below the pathway diagram, select Molecules, then click the Download button.
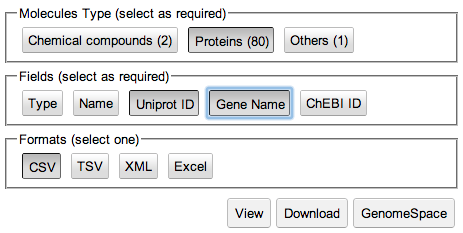
This takes you to the Download form. By default, all fields (buttons) are selected, as indicated by darker shading.
5. De-select all fields except Uniprot ID and Gene Name by clicking on each button each button that you do not want selected.
6. Click on View to preview the gene list.
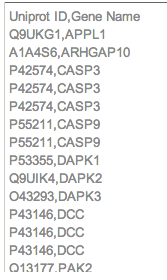
This shows a preview of the text that will be saved to a file. Make adjustments to your selection as required.
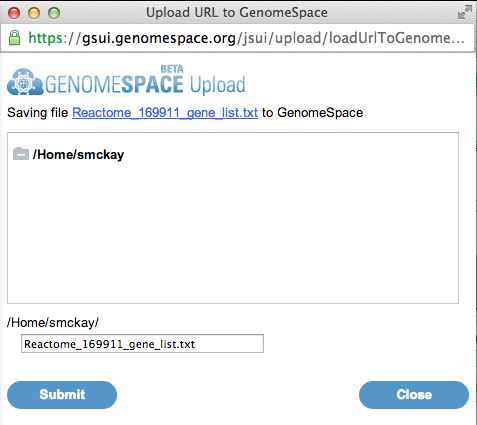
7. To save to your GenomeSpace data store, click the GenomeSpace button.

A window will pop up with a GenomeSpace dialog.
8. Select a file name and location to save the file to in your GenomeSpace data store. Click Submit to save the file, then click Close.
9. Return to the GenomeSpace website. Your gene list should now be there, after refreshing the page.
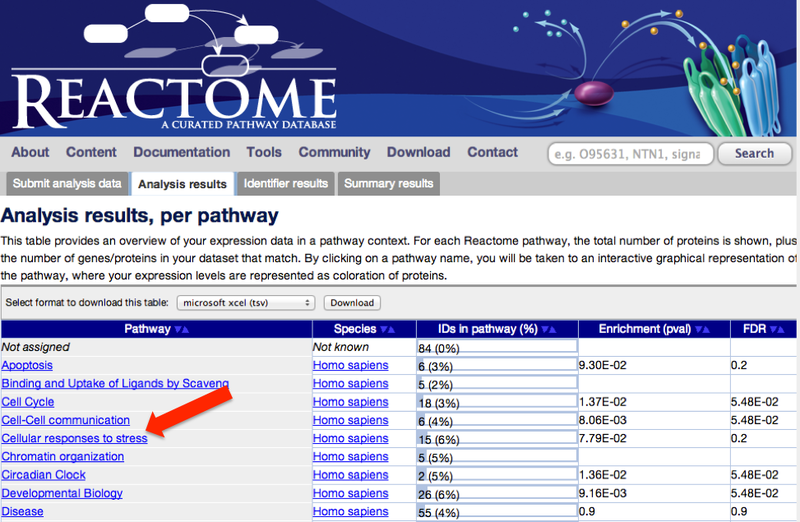
This recipe provides an outline of how to perform pathway enrichment analysis on the reactome website using a list of genes or protein Ids in GenomeSpace. Given a list of gene ideintifers, the goal is to query the reactome database for pathways whose components include the proteins in the supplied list. Enriched pathways are then displayed with the specified proteins highlighted, and the diagrams can be saved back to GenomeSpace.
Input:
Input Formats:
A list of NCBI/Entrez gene ids:
2
21
10257
8038
...
A list of UniProt ids:
O00139
O00186
O00187
O00204
O00217
...
Tab-delimited expression data:
#Probeset 10h_control 10h 14h 18h 24h
200000_s_at 9.381569 9.710802 9.874874 9.934639 9.495911
200002_at 12.555275 12.511045 12.564419 12.538642 12.439174
200003_s_at 12.401259 12.054083 12.275169 12.206342 12.015476
...
For more information about input data, see http://wiki.reactome.org/index.php/Usersguide#Gene_list_Dataset
Recipe Details
1. Drag your gene list file onto the Reactome OR click the icon and select Launch on File, then select your gene list file

You will be sent to the Reactome website.
2. When the analysis is complete, click on one of the top-level pathways, at the left hand side of the screen.
This will take you to the Reactome pathway browser.
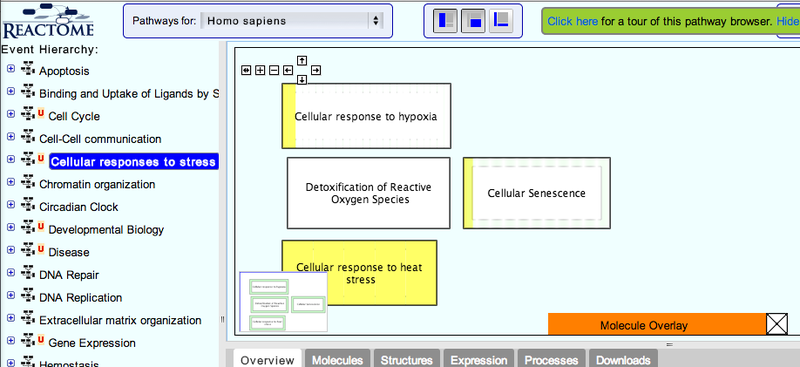
3. Navigate the pathway hierarchy by clicking on the symbol on the left side of the pathway labels.
The pathway diagrams are colorized according to the number of enriched proteins.
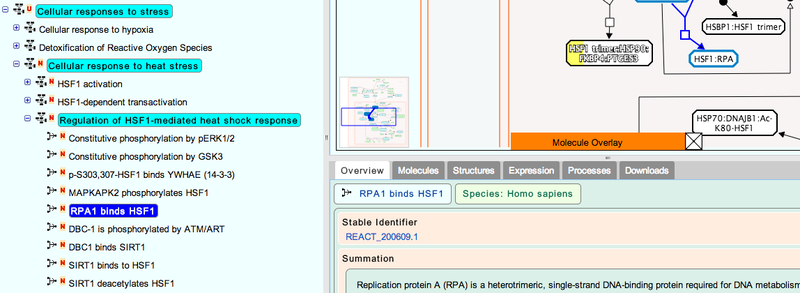
4. Once you have selected your pathway, click the  icon and select Save Diagram to GenomeSpace.
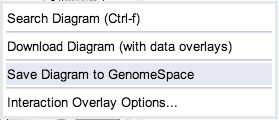
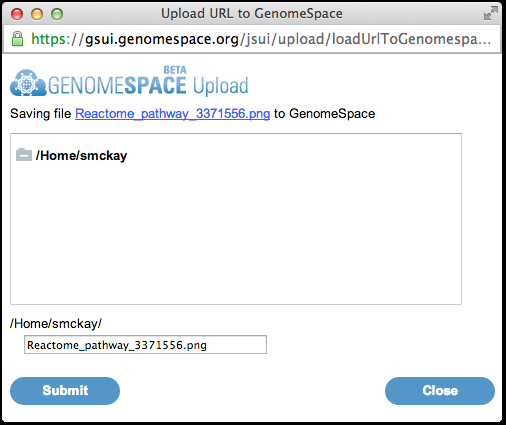
A window will pop up with a GenomeSpace dialog.
5. Select a location to save the file to in your GenomeSpace data store. Click Submit to save the file, then Close.
6. Return to the GenomeSpace website. Your pathway diagram file should now be there, after refreshing the page.